Introduction
This post, I show how to configure elastic pools for Azure SQL Database. Microsoft Azure SQL Database are great for both predictable and unpredictable workloads.
Unpredictability is specially challenging for software as service or called as SaaS Providers. SaaS providers have hundreds or even thousands of customers who then have their own unique mix of performance demands.
A common output is found that SaaS providers over provision their databases to meet variable and peak demands(resource demands) which is not cost effective and brings in management issues.
To solve this and operate cost effective, a predictable cost can be found by using elastic pool databases.
What are SQL elastic pools
SQL Database elastic pools are a simple, cost-effective solution for managing and scaling multiple databases that have varying and unpredictable usage demands.
Elastic pools help solve this problem by enabling you to set a policy for a group of elastic database ensuring that databases get the performance resources they need when they need it.
They provide a simple resource allocation mechanism within a predictable budget.
You don't need to worry about each database or over provisioning for peak demands.
To check price for various service tier, visit Explore all SQL Database pricing options
Configure elastic pools for Azure SQL Database
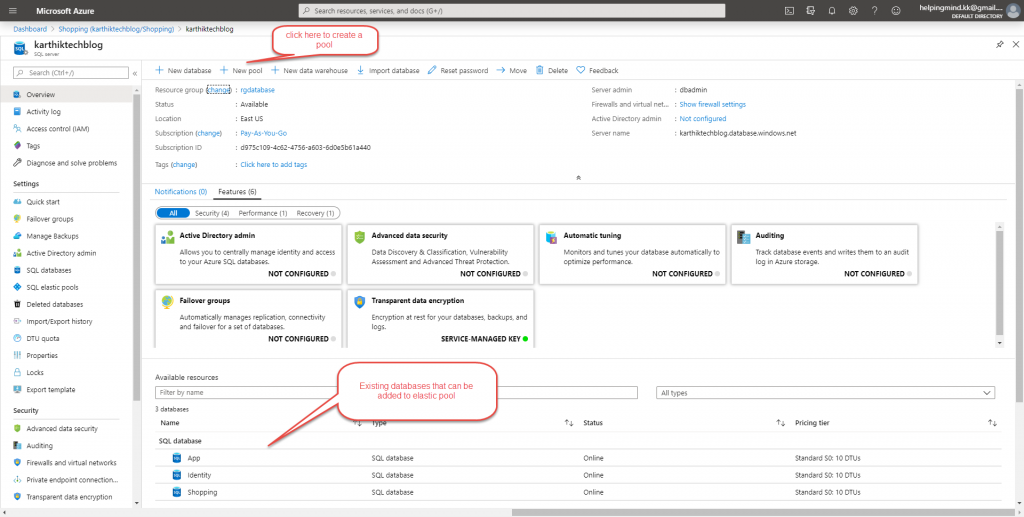
Within the database server blade, you can see I have many databases. simply click on Add Pool.
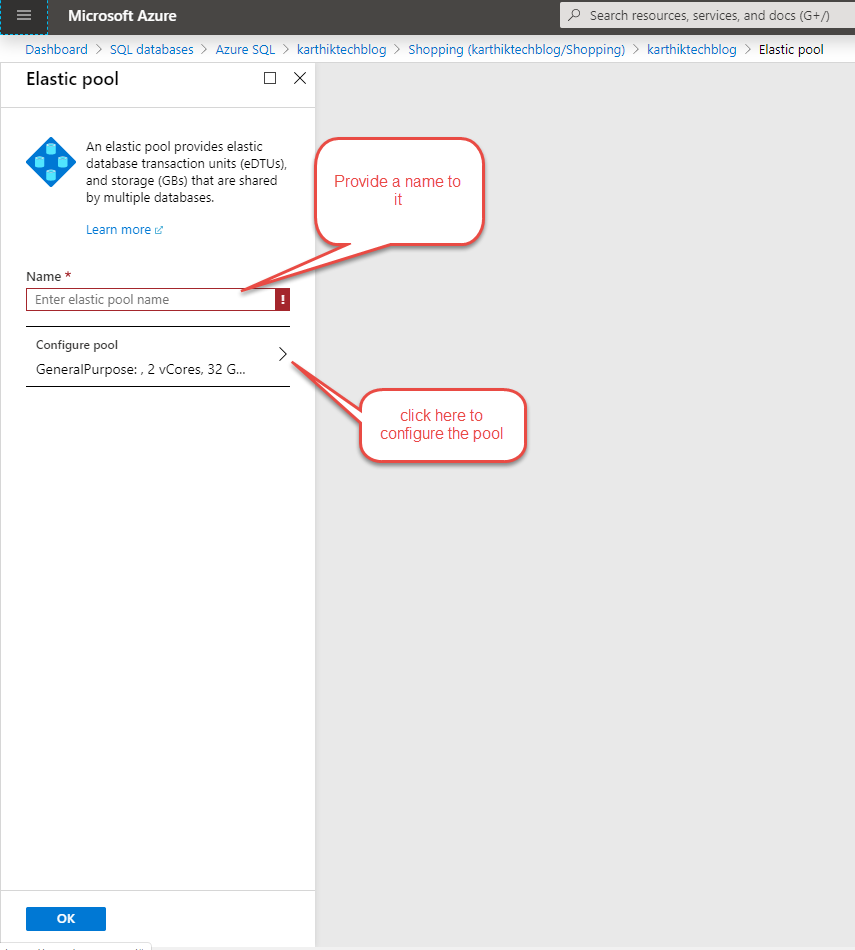
Next is to give it a name. Provide name to the pool .
To choose different elastic pool configuration, click on ConfigurePool option as shown in the above image.
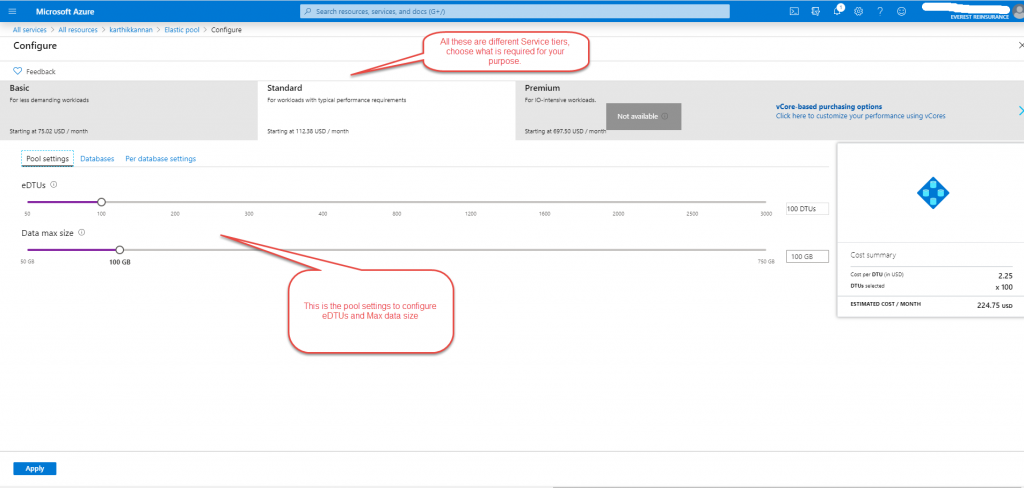
There are many Service Tier available and the pricing differ for each one. Once you chose the right options, click on Databases.
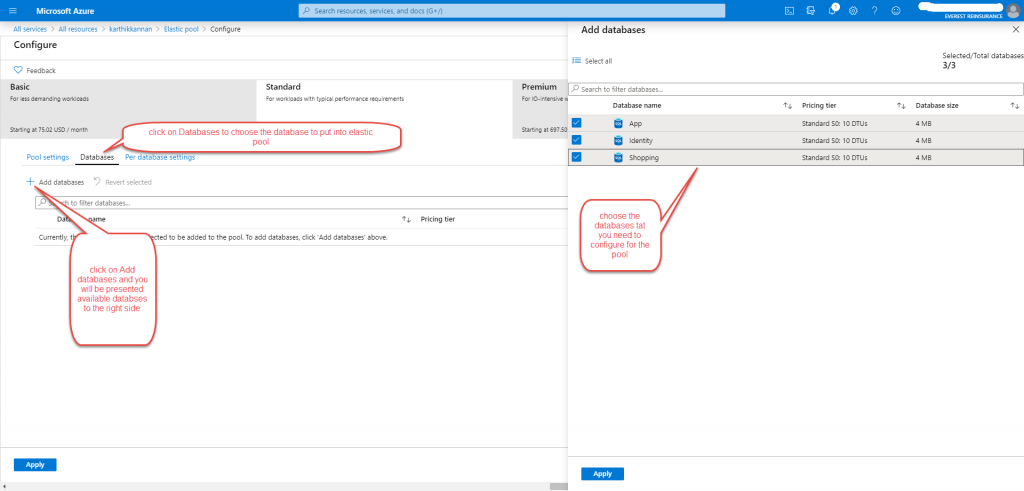
Click on the Plus symbol to see the available databases. Choose the databases from the right side menu.
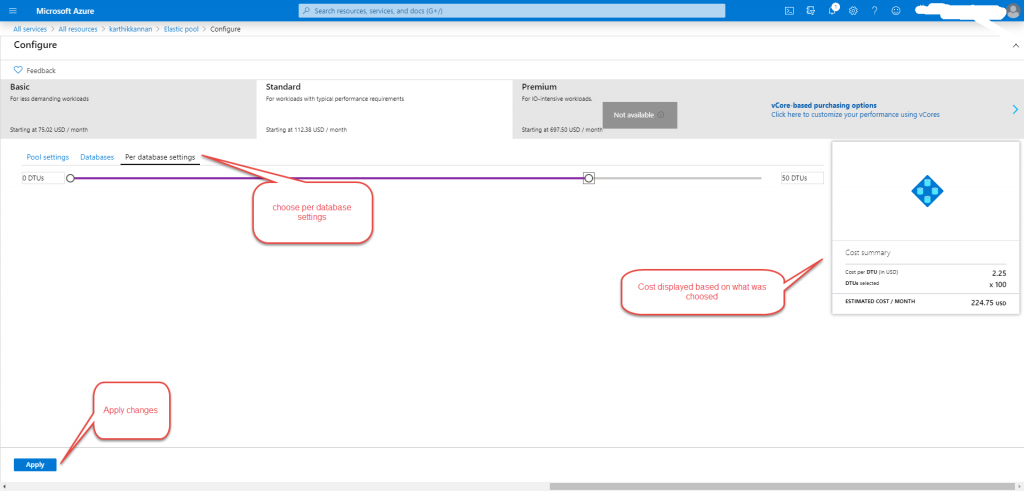
Next option is to choose "PerDatabase" configuration and click on Apply.
Right side you can see the pricing shown per month. Likewise, you can see pricing for different option that you may choose.
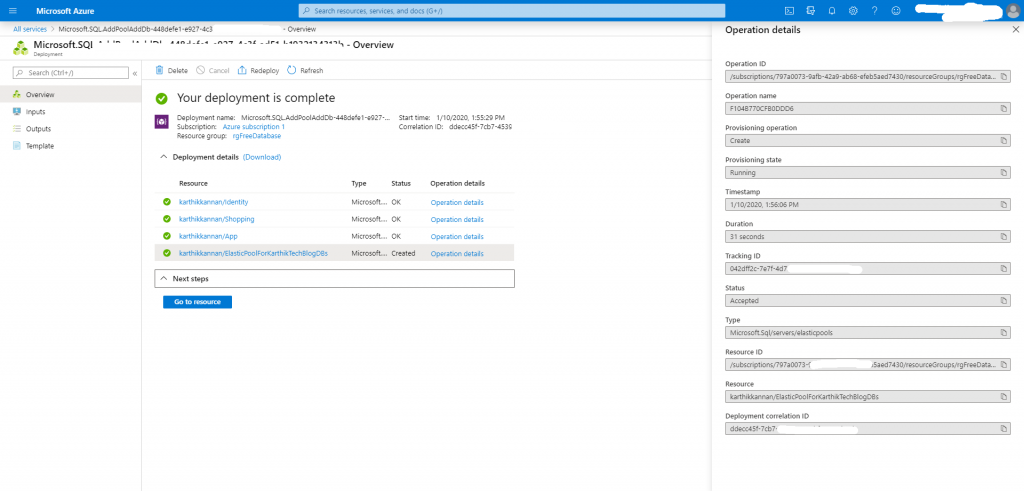
Now you will see “Your deployment is underway” message, please be patience and give few minutes time for the process to complete.
Important to note:
There is no per-database charge for elastic pools. You will be billed for each hour a pool exists at the highest eDTU or vCores, regardless of usage or whether the pool was active for less than an hour.
When should you consider a SQL Database elastic pool
Pools are well suited for a very large number of databases with specific utilization patterns. The more databases you can add to a pool the greater your savings become.
Conclusion
In this post, I showed how to configure elastic pools for Azure SQL Database. The details in this post will help to cover a part of knowledge required to complete Azure AZ-203 certification.
That’s all from this post. If you have any questions or just want to chat with me, feel free to leave a comment below.