Introduction
This post covers how to provision virtual machines using PowerShell. This is part of implementing the IaaS solutions topic (AZ-204 Certification). This is a continuation of the previous post Provision virtual machines using Azure CLI.

PowerShell scripts can be executed in various ways. You can use PowerShell from Azure Portal (Cloud Shell), PowerShell software, or using Visual Studio Code. I showed you how to use the PowerShell window in my previous demo. To install PowerShell in Visual Studio Code follow the instructions below.
The advantage of using Visual Studio Code IDE is that the syntax is nicely highlighted for the PowerShell commands. This helps in finding the issue upfront.
How to use PowerShell in Visual Studio Code IDE
Install Visual Studio Code IDE that is an open-source and free software from Microsoft.
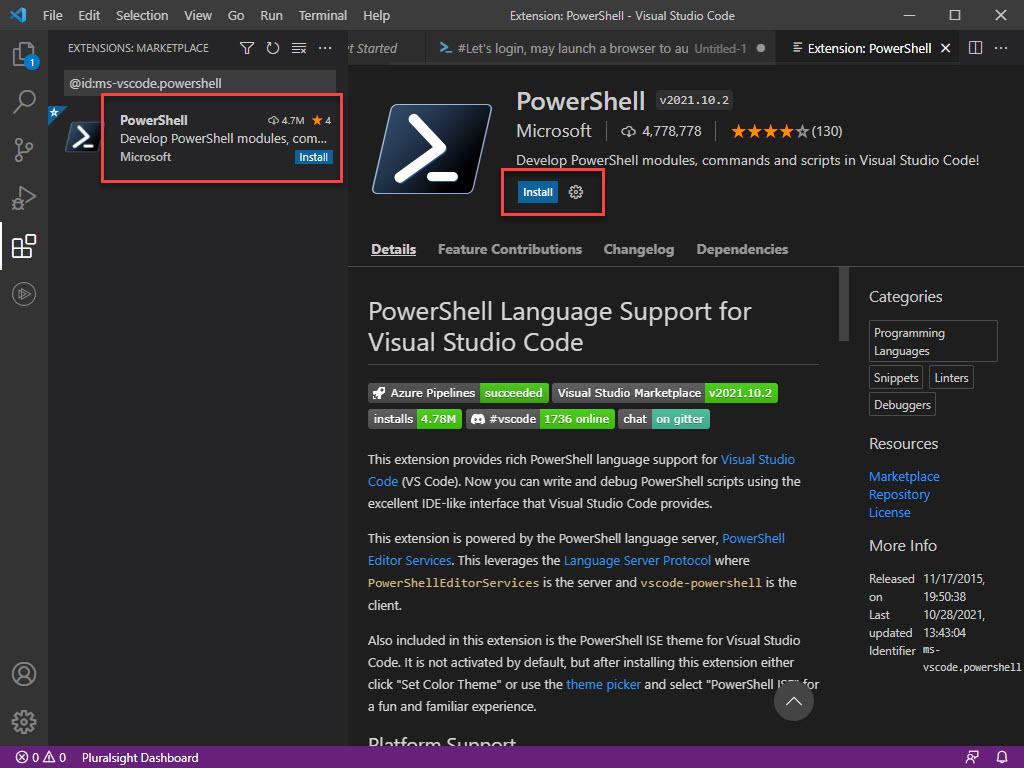
Install PowerShell plugin from the extension. Refer to the below image.
Install PowerShell on Windows, Linux, and macOS
Choose the right installation from this link. As of this writing, PowerShell 7 is the latest. To install the Azure Az module, use this link Install the Azure Az PowerShell module.
How to run PowerShell using Azure Cloud Shell - Azure Portal
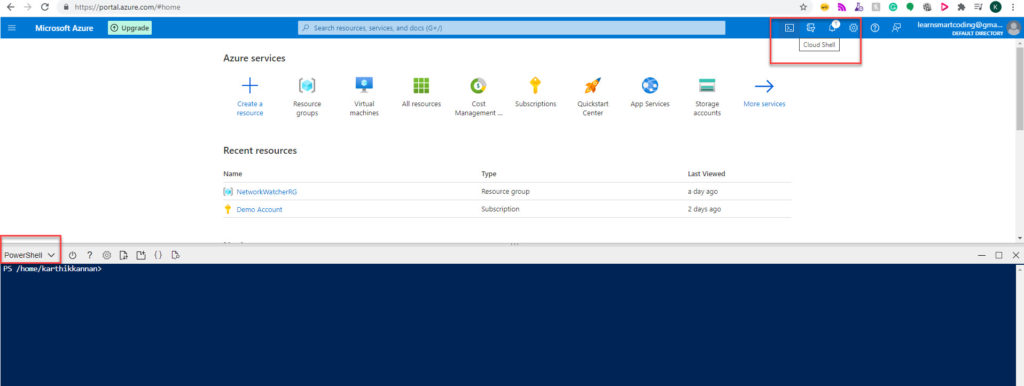
Log in to the Azure portal and on the top right side, click on "Cloud Shell", which opens a prompt to choose either Bash or PowerShell.
Choose Bash to run Azure CLI commands. In our current demo, we will choose PowerShell. After choosing the PowerShell/Bash, it will prompt to install a Storage which will cost a small amount. This is really a small amount.
Provision virtual machines using PowerShell
Creating a virtual machine in Azure with Azure PowerShell using the Az module. Logically the process is the same as creating a virtual machine with Azure CLI.
The first step to creating a virtual machine in PowerShell is to create a PSCredential object which will hold the username and password.
This is used for the credential for the local administrator account on the virtual machine that is deployed.
To create that PSCredential, you define a username and password. Password should match the password requirement from Azure. E.g. combination of Capital letter, lower case letter, number, special characters and it should be 8 and 123 characters long.
Now, you need to convert the string password defined here into a secure string, and you can do that with the cmdlet ConvertTo‑SecureString
Once you have the username and password variables defined, you can create a new PSCredential object with New‑Object, specifying the PSCredential object type, and then passing in the username and password variables as parameters into New‑Object.
Complete PowerShell Commands to provision virtual machines
#This command is required only when you use PowerShell other than Azure Portal as Portal is signed i already we dont need this to run.
Connect-AzAccount -SubscriptionName 'Demo Account'
#Ensure you're pointed at your correct subscription (if you have more than one subscription)
Set-AzContext -SubscriptionName 'Demo Account'


#Create a Resource Group
New-AzResourceGroup -Name "LSCDemo-rg" -Location "EastUS"


#Create a credential to use in the VM creation
$username = 'demoadmin'
$password = ConvertTo-SecureString 'Strongpassword$%^&*' -AsPlainText -Force
$WindowsCred = New-Object System.Management.Automation.PSCredential ($username, $password)


#Create a Windows Virtual Machine, can be used for both Windows and Linux.
#Note, you can create Windows or Linux VMs with PowerShell by specifying the correct Image parameter.
New-AzVM `
    -ResourceGroupName 'LSCDemo-rg' `
    -Name 'LSCDemo-win-az' `
    -Image 'Win2019Datacenter' `
    -Credential $WindowsCred `
    -OpenPorts 3389


#Get the Public IP Address (select-object  is used to pick require property alone from entire JSON response)
Get-AzPublicIpAddress `
    -ResourceGroupName 'LSCDemo-rg' `
    -Name 'LSCDemo-win-az' | Select-Object IpAddress
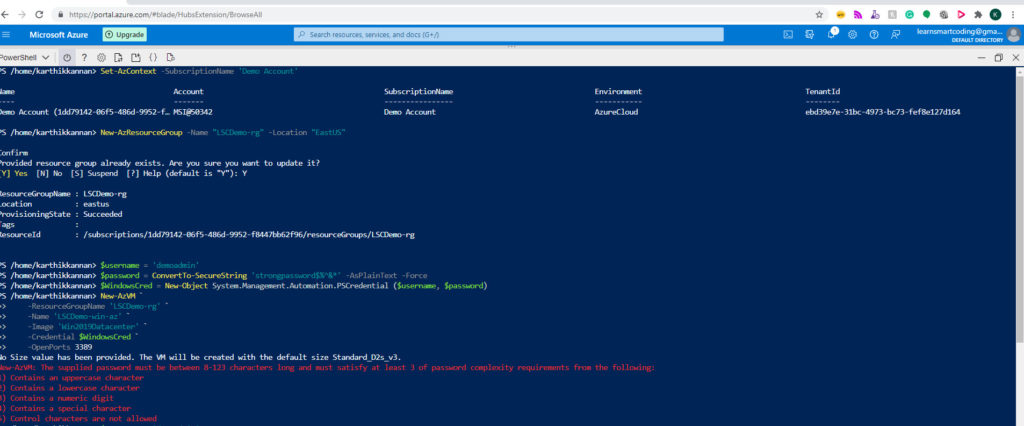
In this demo, the screenshot shows how Azure rejects if the password does not match the requirements.
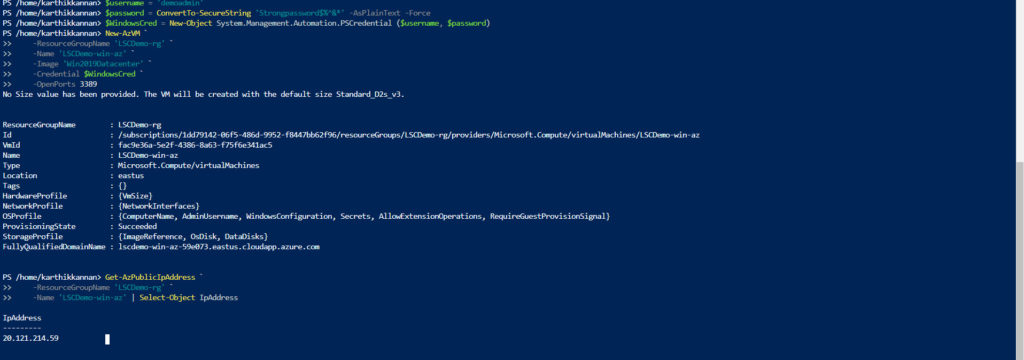
Now the VM is created and we have a public IP to remote login using RDP. You can check this post on how to log in to VM and install Web Server for application deployment.
Video tutorial
Clean up resource
Now the Demo is complete for creating a virtual machine. It is time to clean up the resources we used.
When no longer needed, you can delete the resource group, virtual machine, and all related resources.
Go to the resource group for the virtual machine, then select Delete resource group. Confirm the name of the resource group to finish deleting the resources.
Related resources
- provision virtual machines (VMs)
- configure, validate, and deploy ARM templates
- configure container images for solutions
- publish an image to the Azure Container Registry
- run containers by using Azure Container Instance
Conclusion
In this post, I have covered the topic of the Provision of virtual machines using Azure PowerShell that is part of implementing IaaS solutions. This post also covers various other PowerShell tools to use. For more, refer to AZ-204 Certification. Happy learning!.
Very good blog you have here but I was curious about if you knew of any discussion boards that cover the same topics talked about in this article? I’d really love to be a part of online community where I can get advice from other knowledgeable people that share the same interest. If you have any suggestions, please let me know. Thanks a lot!|